Last week I spent a fair amount of time trying to integrate the Trend Micro Deep Security as a Service product with Azure AD using SAML. Unlike most of the SAML work I’ve done with Azure AD this one was not entirely straightforward. At the time of writing Trend Micro had no documentation specific to using Azure AD as the SAML Identity Provider. They also haven’t thought to work with Microsoft on getting their product into the App Gallery.
If you have to go through the process hopefully this will save you some time.
I’m going to assume you already have some experience with Azure AD and SAML.
Step 1. Download the Service Provider (SP) metadata XML
On the Administration tab of the Deep Security portal look for SAML below the User Management->Identity Providers node in the left hand pane.

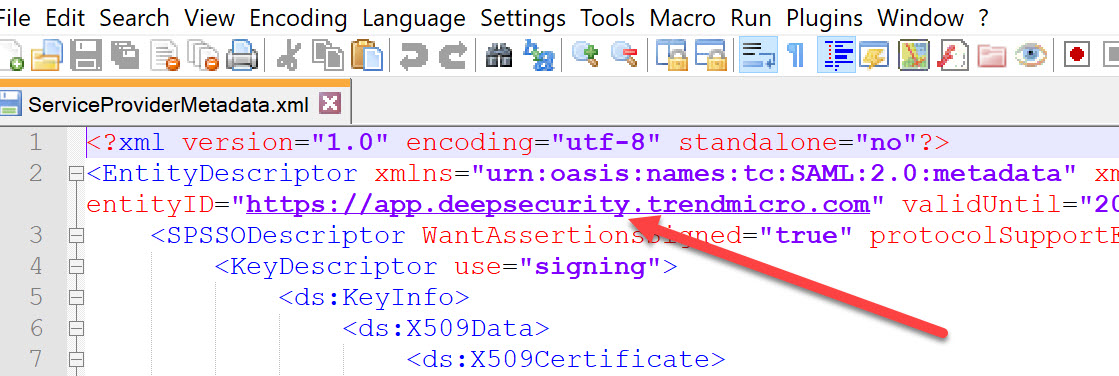
Select the Download option and save the XML file locally. Open in an XML editor (I use Notepad ++) to view the contents. You will need this to extract certain values for use with Azure AD.
Step 2. Create a new Enterprise Application in Azure AD
In the Azure Portal, select Azure Active Directory and choose Enterprise Applications blade. From there create a new non-gallery application and name it, e.g. Trend Micro Deep Security as a Service.
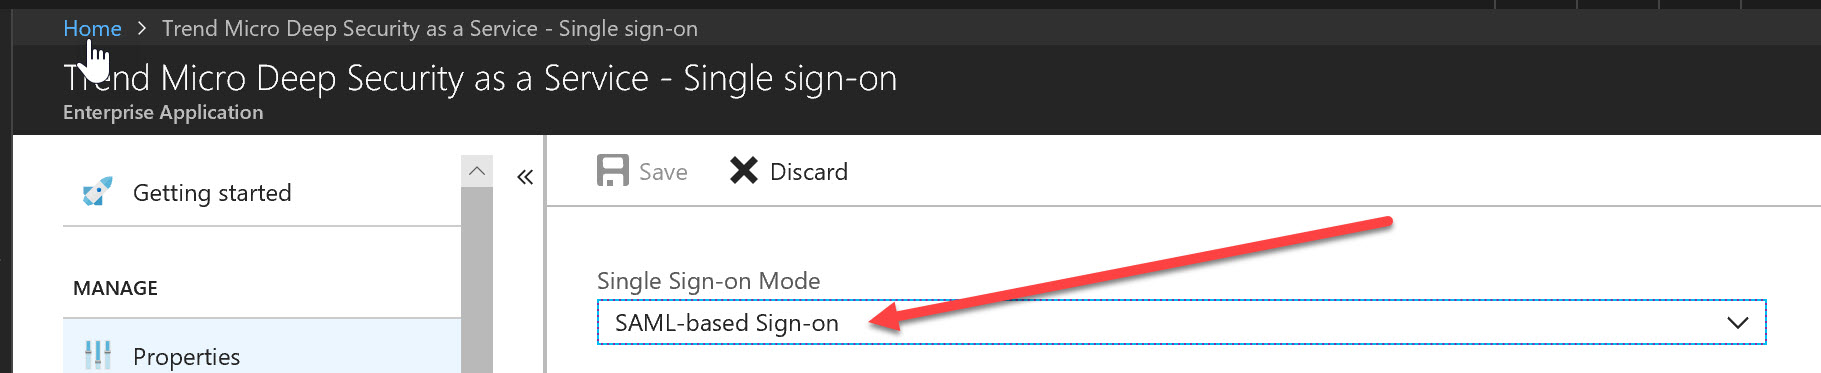
On the Single Sign-on blade select SAML-based Sign-on.
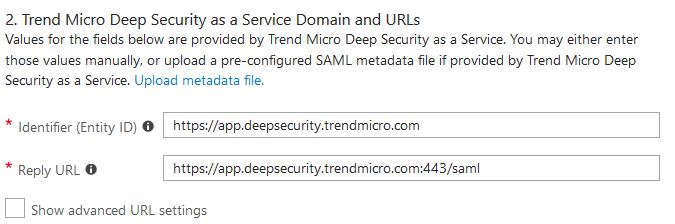
Copy the Entity ID value from the metadata XML file you downloaded in Step 1 and enter it into the Identifier (Entity ID) field.
Copy the AssertionConsumerService Location value from the metadata XML file and enter it into the Reply URL field.

The values should appear the same as (or similar to) the screenshot below.
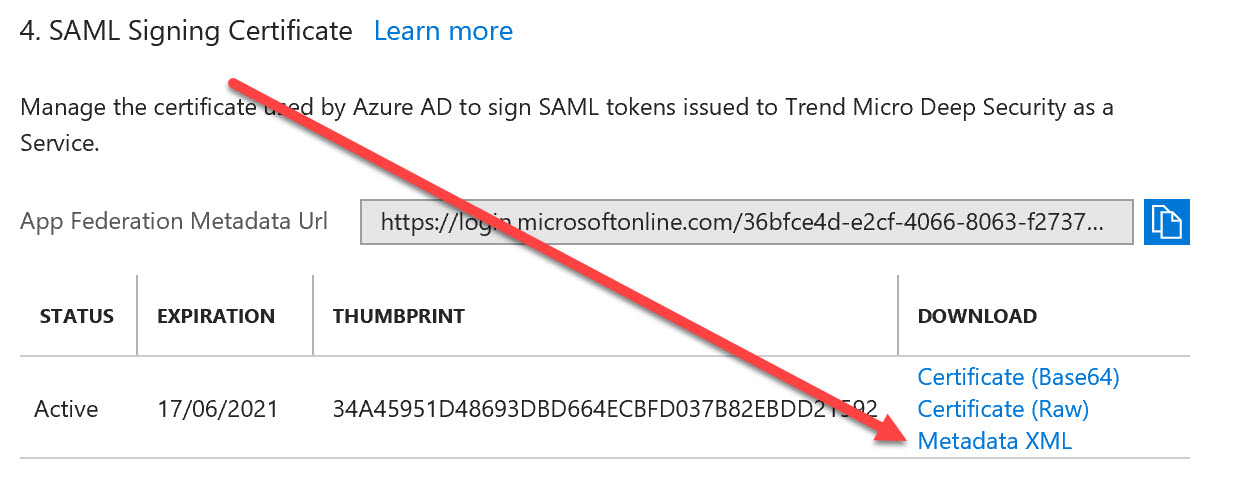
Save the configuration and download the AAD Identity Provider metadata XML. You will need this for upload into the Deep Security portal.
Step 3. Add a new SAML Identity Provider in Deep Security
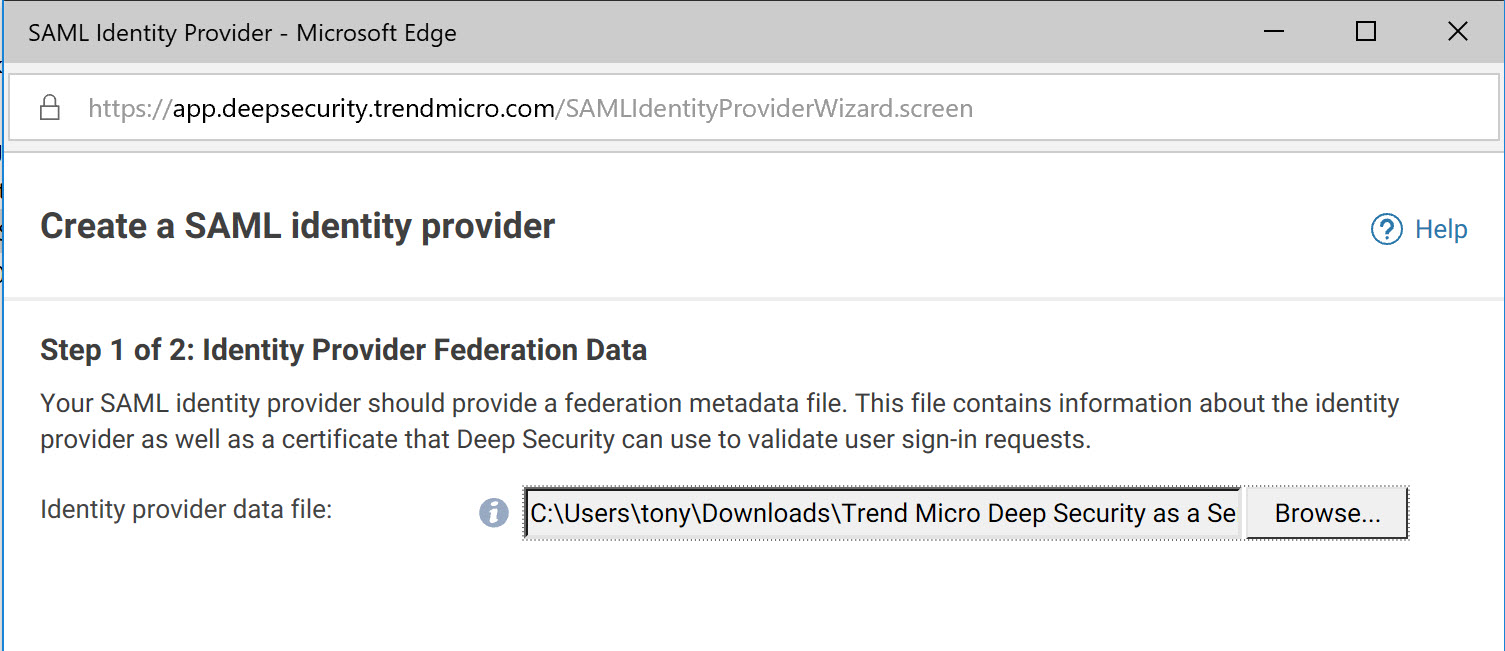
Back in the Deep Security portal, select the option to add a new Identity Provider. You will find this option in the Administration tab below User Management->Identity Providers->SAML.
Browse to the Identity Provider metadata XML file you downloaded at the end of Step 2.
Once it is uploaded, provide a name and description for the Identity Provider. I recommend you use AzureAD as the name (make a note as you will need this later).
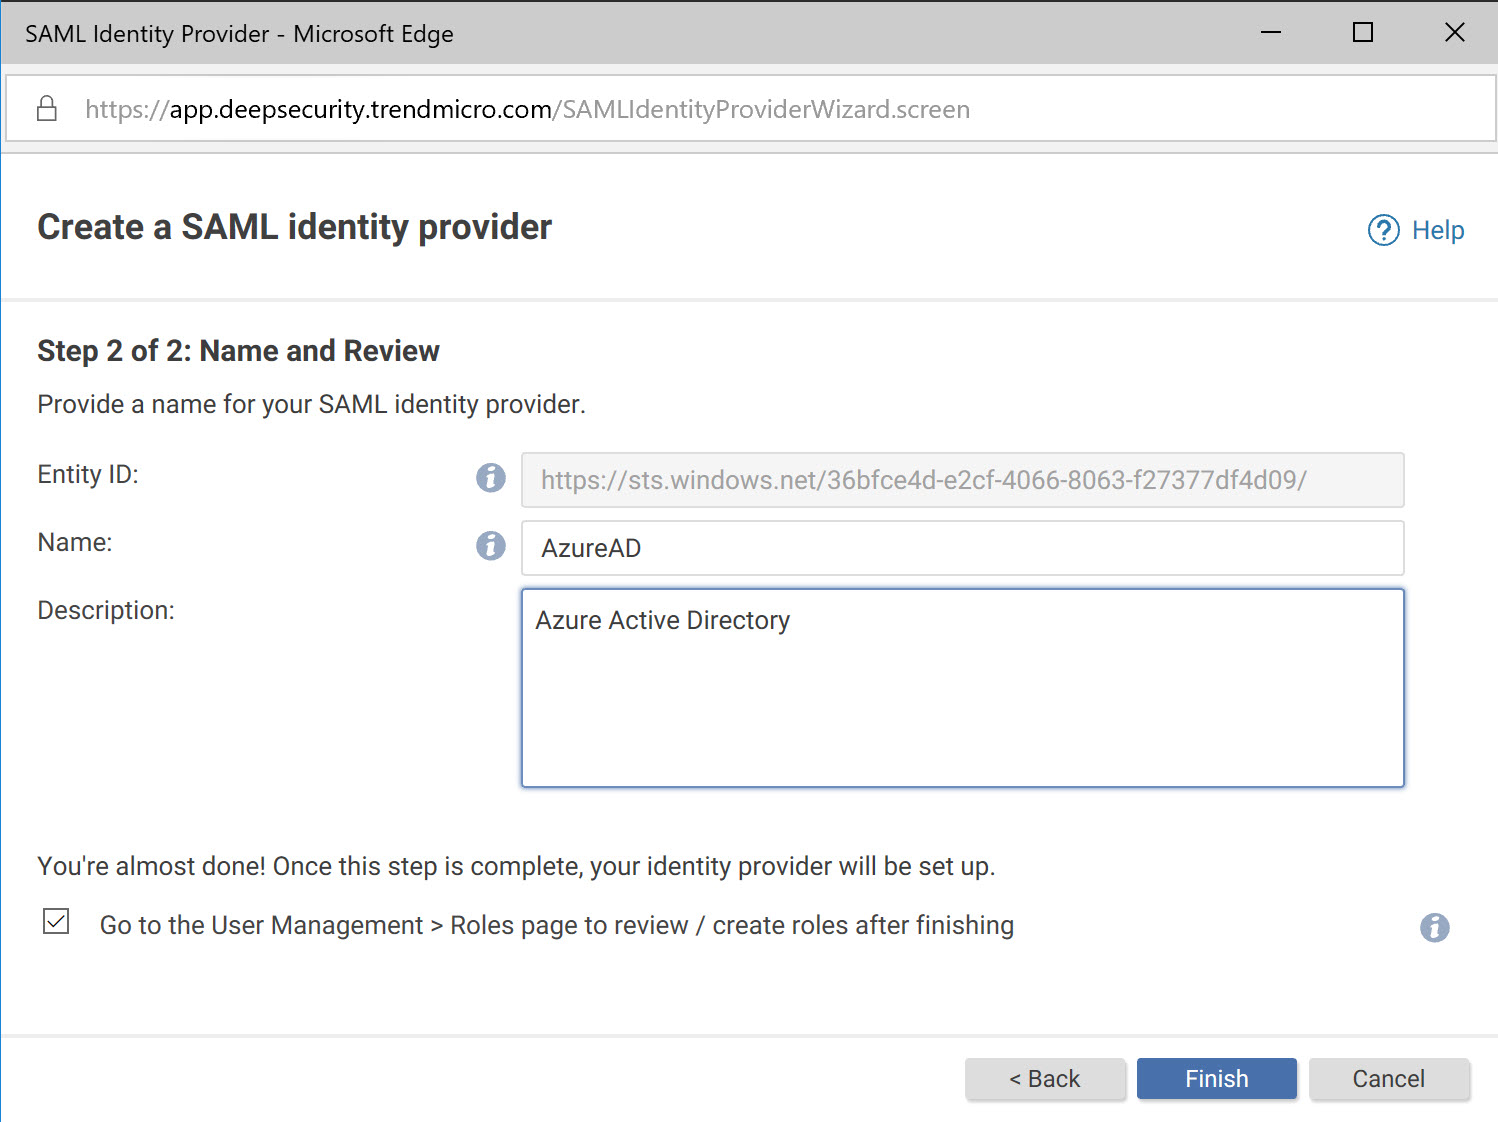
Finish the wizard.
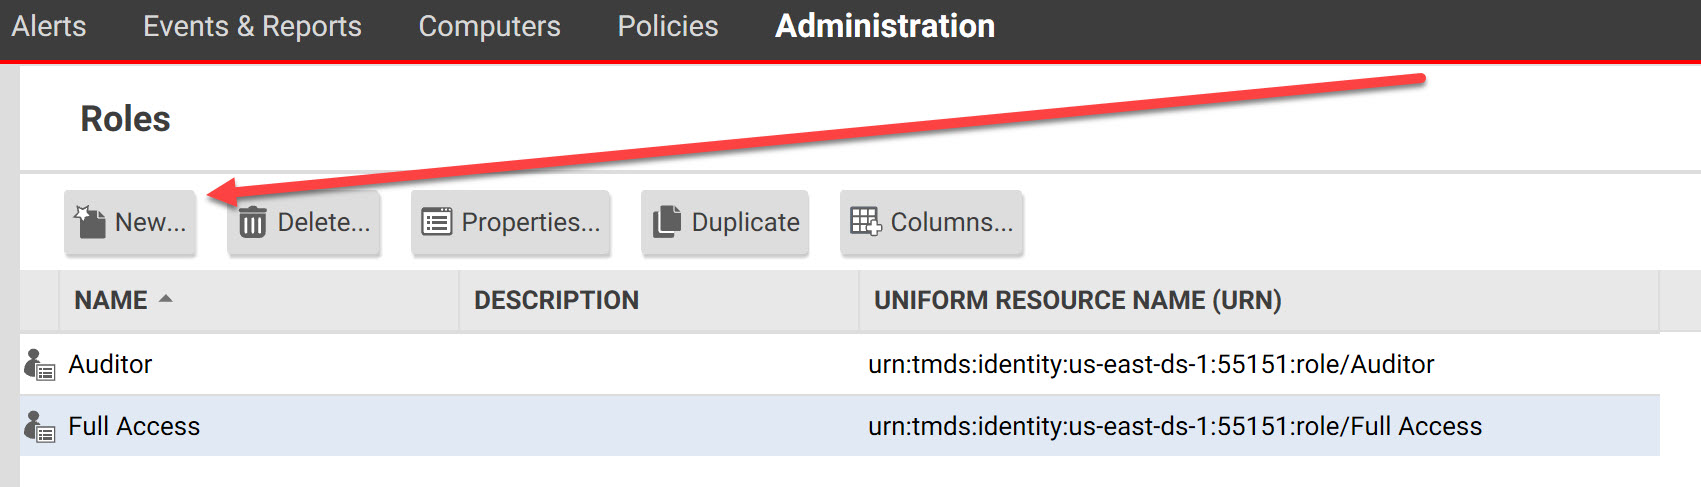
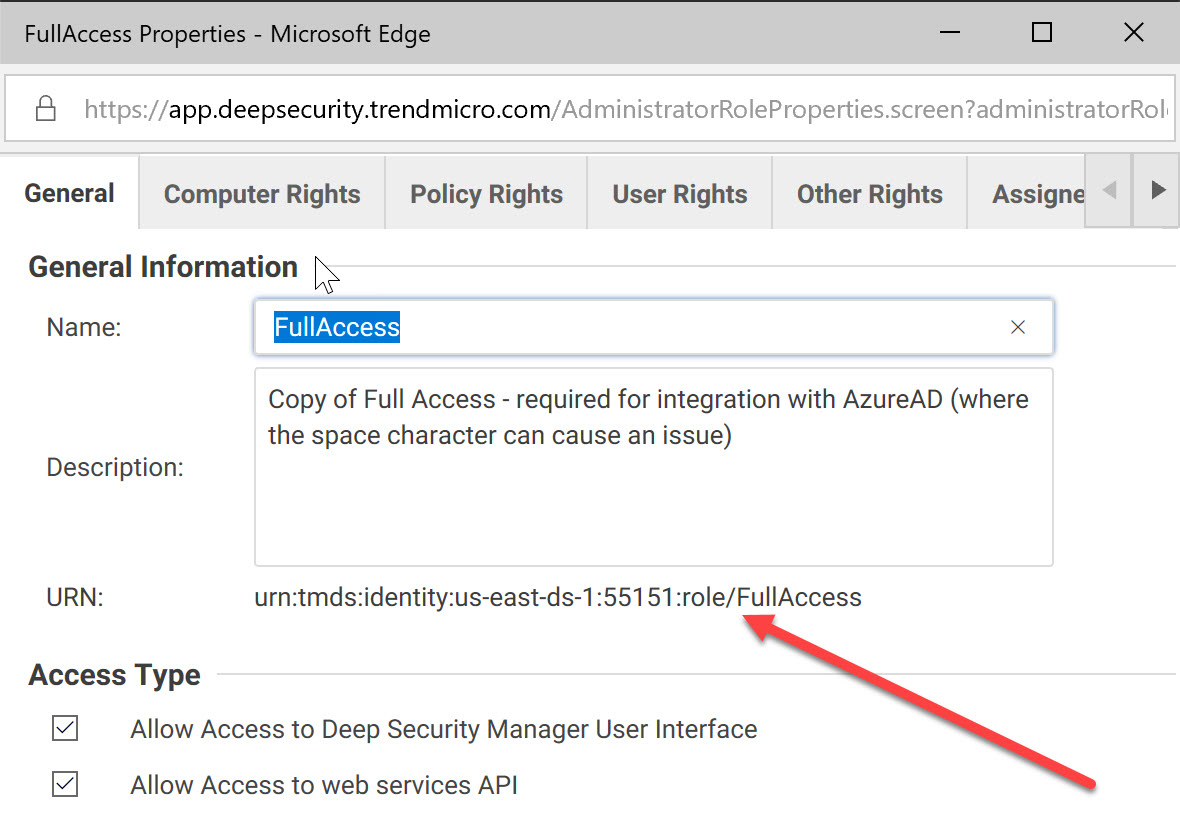
Step 4. Create a new Full Access role in Deep Security.
At the time of writing, Azure AD can’t cope with a space in the roles claim value, so you will need to create a new Full Access role in Deep Security that has a name with no space (e.g. FullAccess).
Modify the values in the wizard so that the permissions for the new FullAccess role match those of the built-in Full Access role.
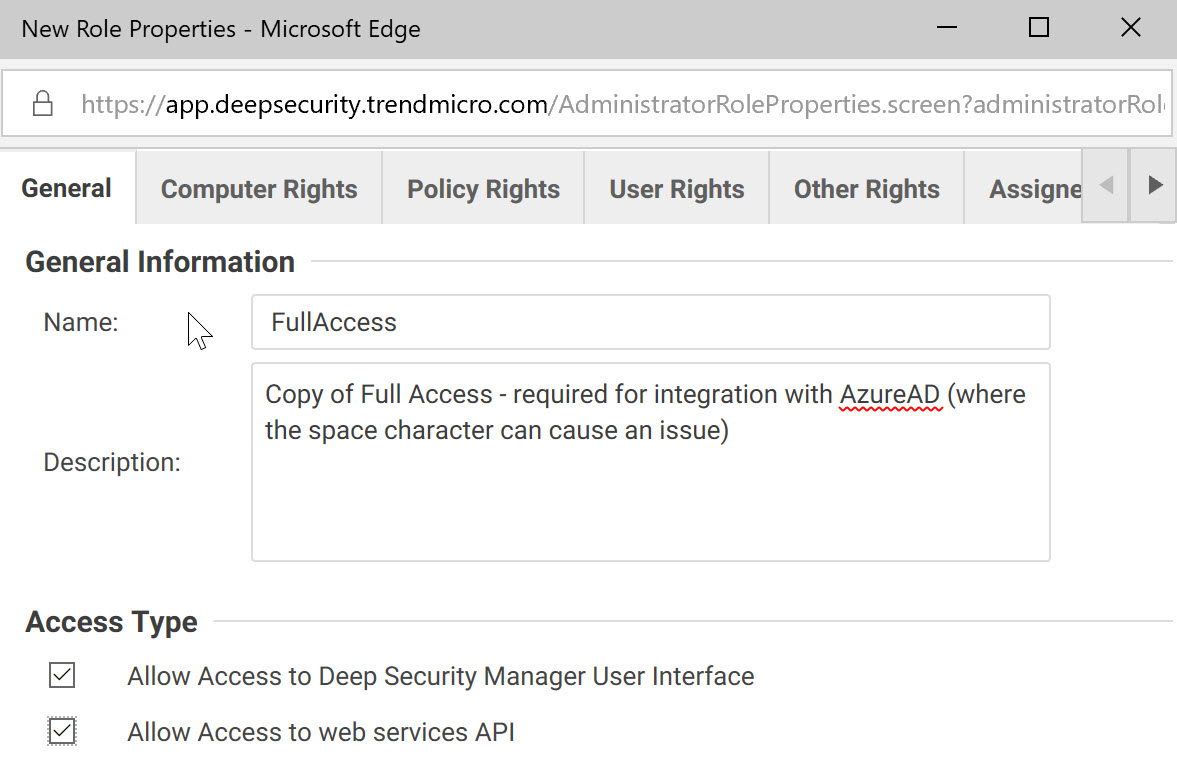
Save the changes.
Make a note of the URN value for the newly created role.
Step 5. Add attributes to the Azure AD Enterprise Application
Deep Security requires specific attributes to be present in the SAML response token. You will need to add two new attributes named RoleSessionName and Role to the Enterprise Application you created previously. The reason for adding them now, as opposed to when you created the application is because the Role attribute requires the URN elements generated in the Deep Security portal after the import of the AAD Identity Provider metadata.
You add new attributes on the Single Sign-On page of the Enterprise Application in the AAD section of the Azure Portal.

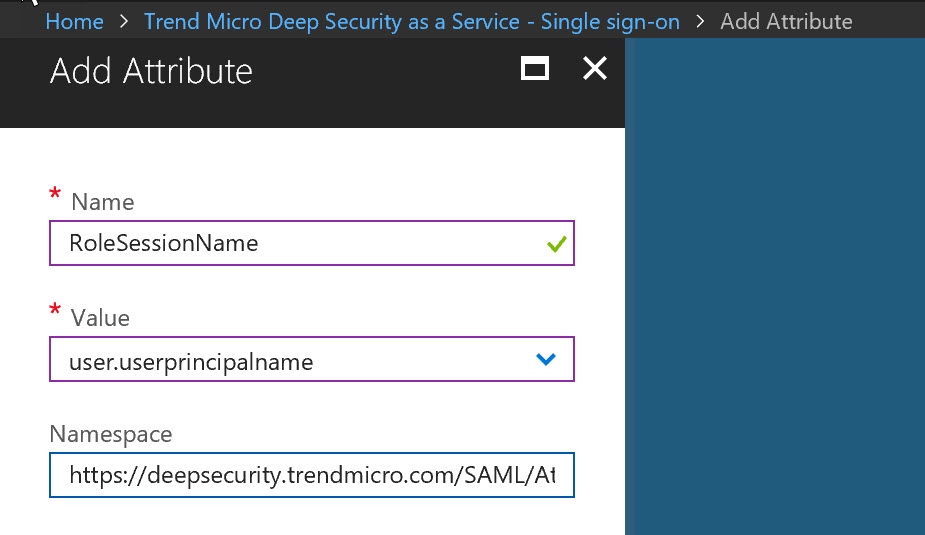
Let’s take the RoleSessionName attribute first as this is the simplest.
Name=RoleSessionName, Value = user.userprincipalname, Namespace=https://deepsecurity.trendmicro.com/SAML/Attributes
The Role value is the tricky on as it has a very specific syntax as defined here.
Name=Role, Value = urn:tmds:identity:[pod ID]:[tenant ID]:saml-provider/[IDP name], urn:tmds:identity:[pod ID]:[tenant ID]:role/[role name] , Namespace=https://deepsecurity.trendmicro.com/SAML/Attributes
In my example, the Value becomes: urn:tmds:identity:us-east-ds-1:55151:saml-provider/AzureAD,urn:tmds:identity:us-east-ds-1:55151:role/user.assignedroles
The URN values are derived from those generated inside the Deep Security SAML configuration. The AzureAD in bold above is the IdP name we used when defining the Identity Provider in Deep Security.
Creating the correct syntax when adding the attribute involves using the Join() function as shown below. This is to separate the URN sequence from the built-in user.assignedroles definition.
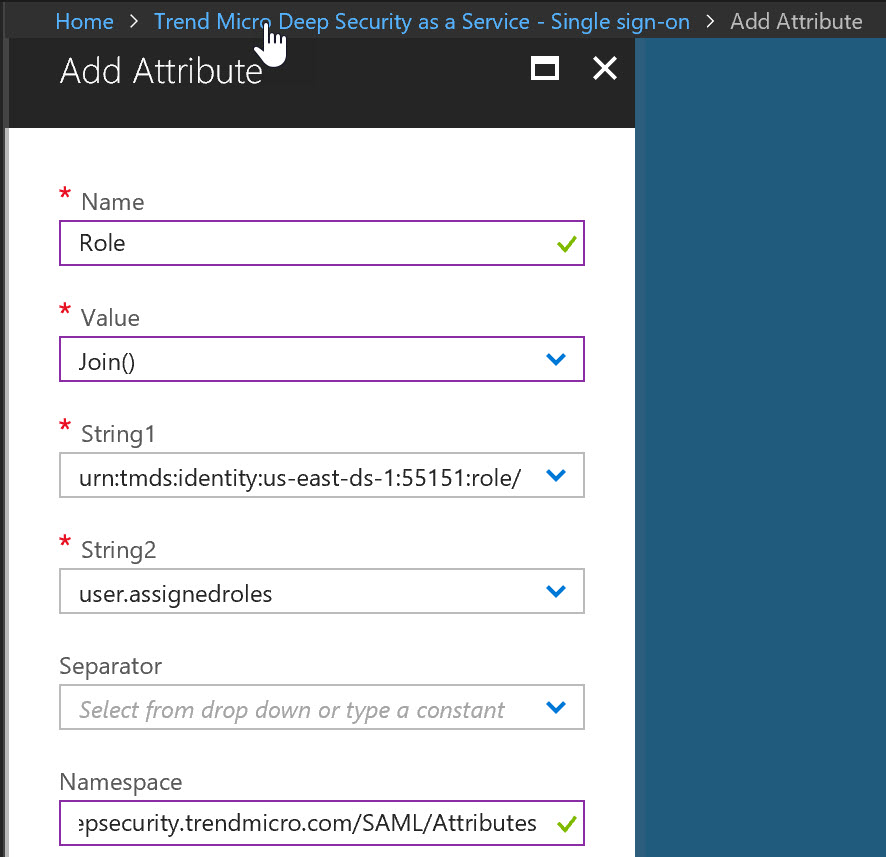
This was the value I put into the first part of the join (as it may not be clear from the screenshot above):
urn:tmds:identity:us-east-ds-1:55151:saml-provider/AzureAD,urn:tmds:identity:us-east-ds-1:55151:role/
Note that the trailing forward slash is required.
Save the updates to the enterprise application.
Step 6. Manually edit the Manifest associated with the application
Each Enterprise Application that you create in Azure AD creates its own Application Registration. In order to create role definitions that match those you’ve created in the Deep Security portal, you will need to edit the manifest associated with the application you have created in Azure AD.
To find your application registration in the Azure Portal, open up the Azure Active Directory node and select App Registrations. Change the default view from My Apps to All Apps and search based on the name of the application you created for Trend Micro Deep Security. Select Manifest to open the Manifest editor.

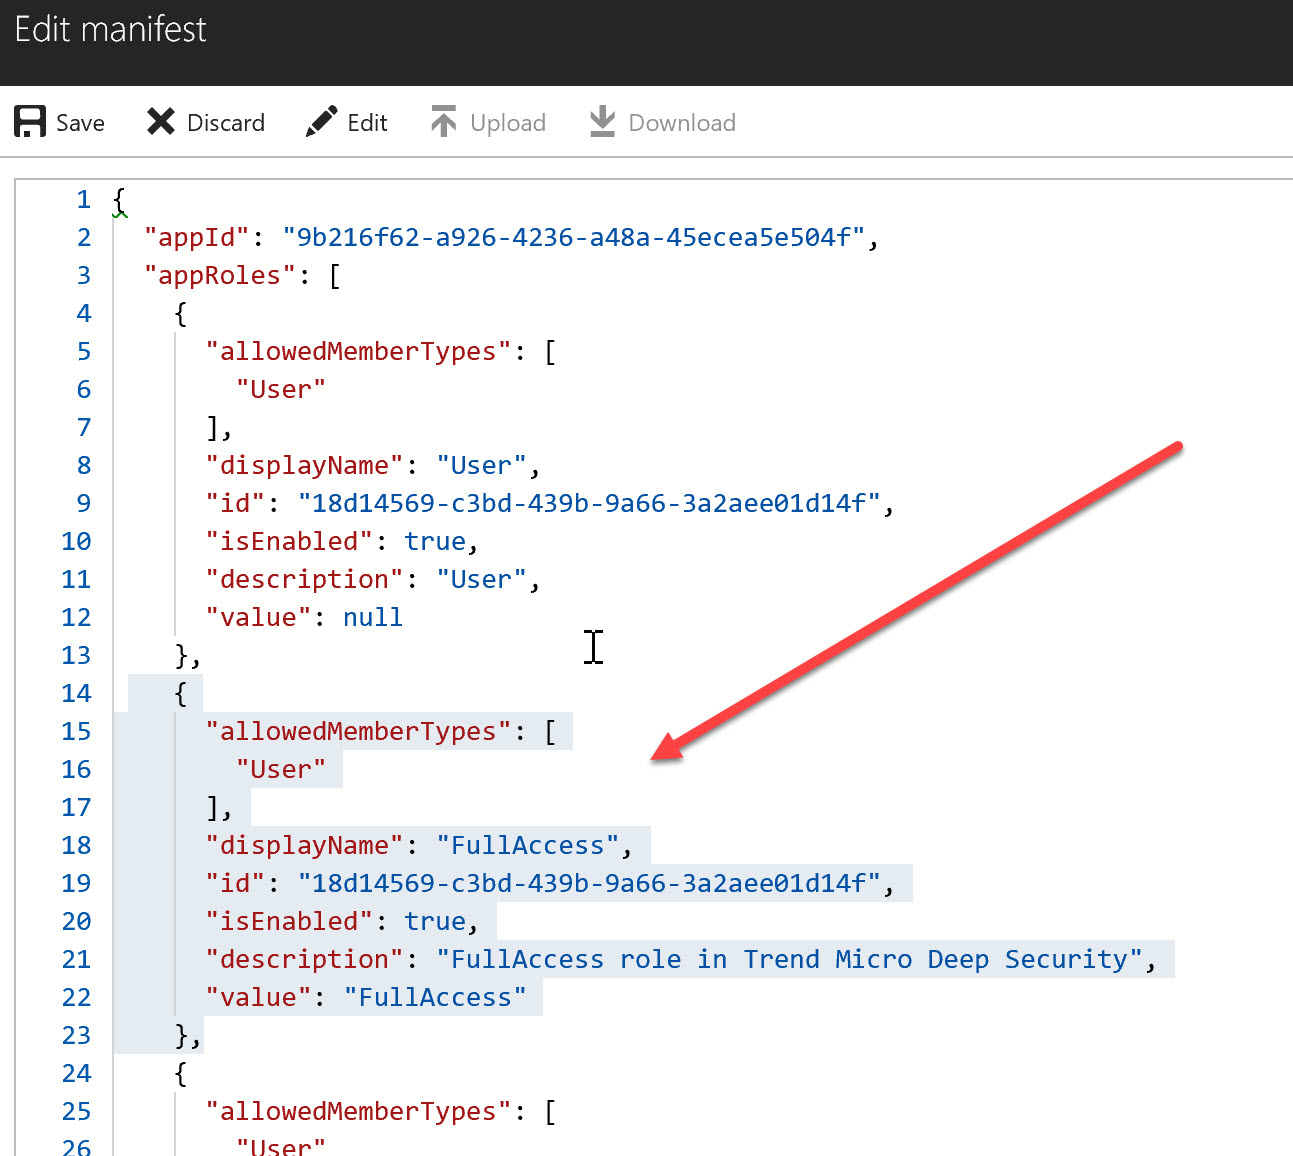
Under the appRoles node within the JSON file, select and copy the definition of the “User” role. Be sure to copy the entire definition including the start and finish braces and paste below the “User” role definition. In the part you have copied, replace the displayName, id, description and value definitions so that you have a new role named FullAccess. For the id you simply need a unique GUID (you can generate one from www.guidgenerator.com). Your edit should look similar to the screenshot below.
Save your changes to the manifest.
Note that spaces are not currently permitted in the “value” part of the role definition, which is why we had to create our FullAccess role based on the the built-in FullAccess role in Deep Security.
Step 7. Assign users and/or groups to the new role
Once your FullAccess role has been defined in the manifest, you should be able to assign users and/or groups to the Enterprise Application you have defined in Azure AD. You do this by selecting the Users and groups option within the application.

Step 8. Test your sign-in
Now that you have assigned the FullAccess role to a user in Azure AD you are ready to test the sign-in. The application should be visible in the myapps.microsoft.com portal. If the configuration is successful, you should be able to access the Deep Security application portal.
And that’s it! Of course you are free to define extra roles by following the steps shown to define the role both in Deep Security and Azure AD.
As you can see this is slightly trickier than most SAML integrations. Hopefully it saves you some time if you have to do it. With a bit of luck Microsoft will add Deep Security as a Gallery application the near future and you won’t need to go through the pain.
Tony
Top work Tony!
Thanks for post, this was really helpful!
Hello,
In Trend micro documentation I can see we have to import Role urns and IDP urns. What about IDP urn ? Where did i put IDP urn ?
Is anyone have an answer ?
Thanks
I worked with Trend Micro and they added the new page for this setup.
https://help.deepsecurity.trendmicro.com/saml-single-sign-on-azure-ad.html?redirected=true
Hope this helps and it works for me.